DIY Equatorial Mount

All things Physics

DIY Equatorial Mount

Postby Jerry » Thu Apr 24, 2014 12:01 pm

As if I didn't have enough projects going on all at once I have started yet another, an equatorial mount for my telescope. This stems from trying to set up my 10" Meade LX200 for astrophotography. By the time I added the off axis guider, the filter wheel, focuser, and finally a camera on the scope I lost a lot of sky due to everything hanging off the back. Add a wedge to turn the alt/az form mount into an equatorial means I lost any chance of pointing north.

ImageIMG_2393 by macona, on Flickr

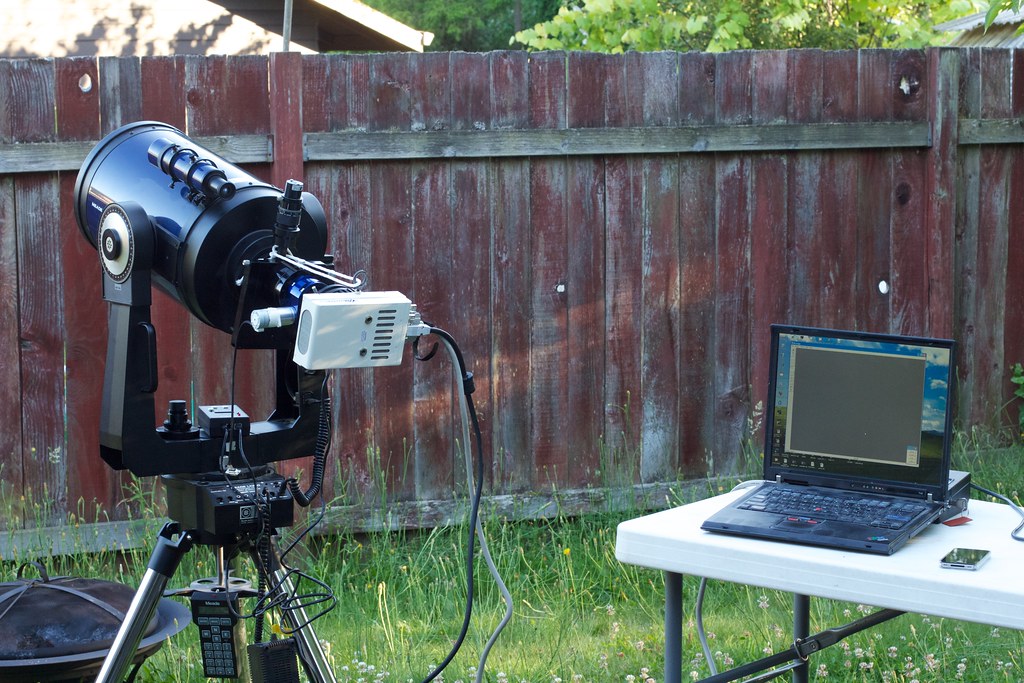
The solution seemed to be to take the OTA (Optical Tube Assembly) off the forks and mount it to something like a German Equatorial Mount (GEM). A GEM allows the scope to swing around without clearance issues for the most part. But, boy are they expensive. A low end one if $1500+!

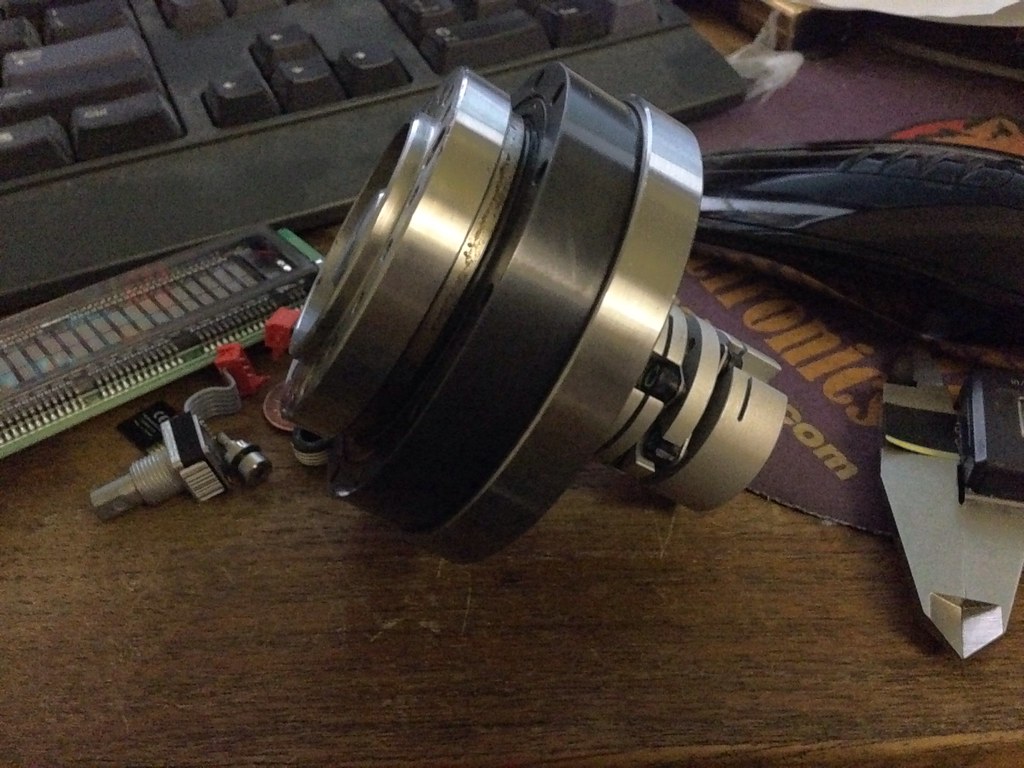
So I figured it is time to build one myself. Probably 10 years ago I picked up an old PRI robot that had come out of intel or something, I think it had moved around wafer boat or something. Took most of it apart, gave the steppers away, and kept the useful stuff. Bunch of linear slides and stuff. The one gem was the big harmonic drive that the robot rotated on. The OD on the driven disc is 10" in diameter and it is supported by a nice, large ~8" bearing under it. All made out of aluminum so it is still reasonably light. This is going to be my Right Ascension (RA) drive.

Harmonic drives are very cool, they use a flexible spline on an eccentric bearing that wobbles inside another spline with a couple more teeth than the flexible one. Since there is alway hard contact between the flex spline and the outer splice the drive is truly zero backlash. They are used in a lot of places like robots, cnc and even the moon rover. It used one harmonic gear in each wheel. Here is a video of the one I am using, you can see the flexing of the spline. This is 102:1 gear ratio.


I have since taken it apart and cleaned it out, it runs much smoother now. The drive had a DC servo on it with a 500 count encoder. I tried setting it up with one of my little Elmo Harmonica servo drives like what I used with the laser cutter but it would just not tune. I dont thing the drive could supply enough current. Also after doing the calculations I found 500 lines is just not enough, that is less resolution than the mount I am already using. After messing around with various combinations of servos and gearboxes to drive it I have settled on a Mitsubishi MR-J2 200W brushless servo with a Bayside 10:1 gearbox. This drives the harmonic drive and gives me a resolution of 8,355,840 steps per rev. This puts me way above useful resolution.

For the Declination (Dec) drive I am using another Mitsubishi 200W servo, this one is a MR-J2S series with a 131,072 count encoder. This will drive another Bayside gearbox, this one 3:1 and then that will drive a 80:1 harmonic drive which will have the saddle for the telescope on it. This gives me stupidly high resolution of 31,457,280 steps per rev. I may try direct driving the harmonic drive bypassing the 3:1 gearbox, I am pretty sure it will have enough torque. The OTA is adjusted on the dovetail mount to balance it.

The Dec harmonic drive is pretty neat, it is basically a cross roller slewing bearing with a harmonic drive built in. I think these were pulled out of SCARA robots, I got one from S. Korea shipped for $180. More than I would have like to pay, but oh well. Considering I have had all the rest of the parts lying around I cant complain too much!

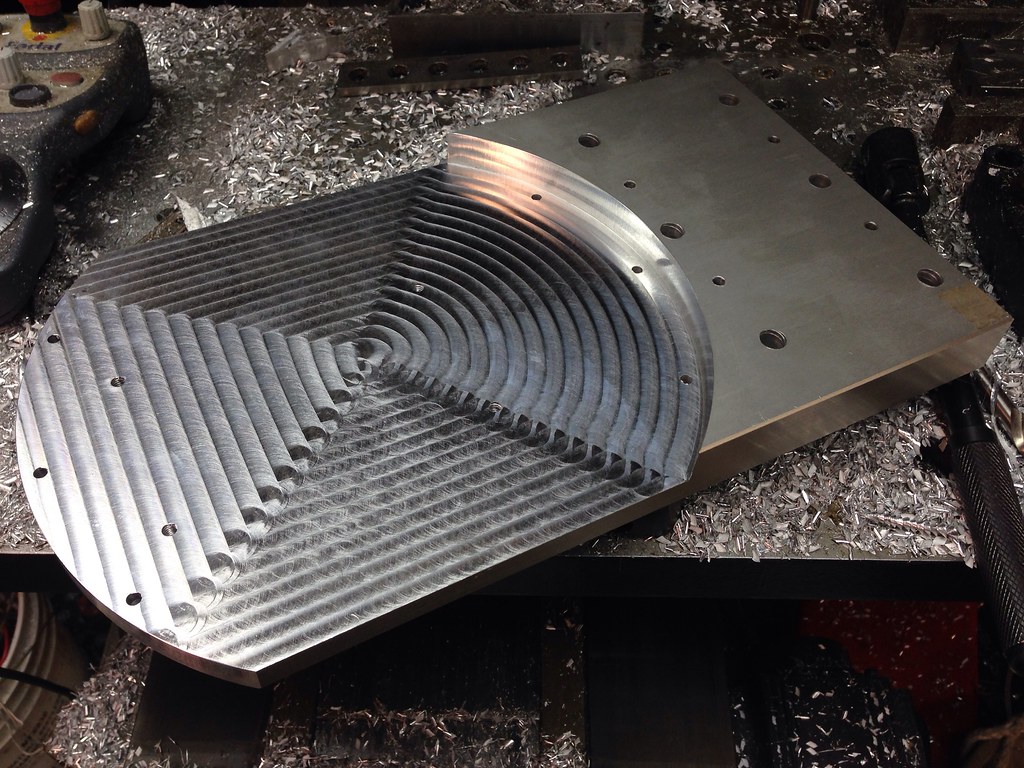
Im now drawing up the design for the tilt mechanism for setting the angle of the RA drive and figuring out how I am building the motor mount for the Dec drive.

This is the back of the main harmonic drive with a servo and the gearbox attached. There are commercial GEM setups available but they start around $20k!

Image
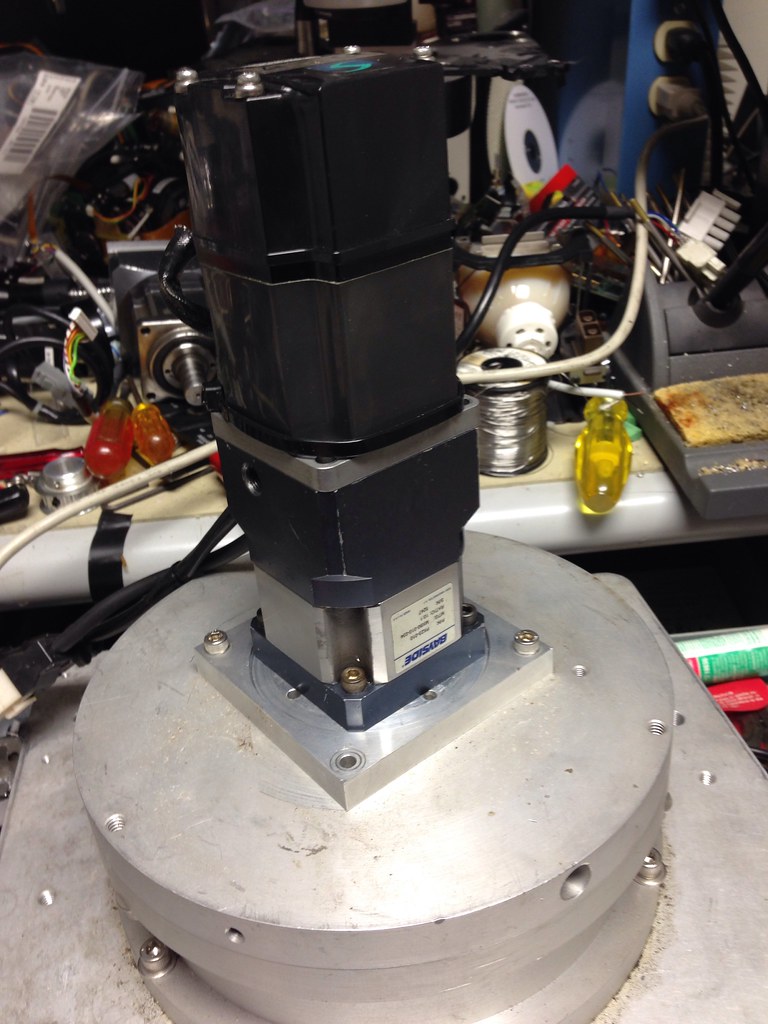
Harmonic drive with mitsubishi servo by macona, on Flickr
Jerry
 
Posts: 573
Joined: Sun Jul 18, 2010 12:07 am
Location: Beaverton, OR

Re: DIY Equatorial Mount

Postby Doug Coulter » Thu Apr 24, 2014 9:24 pm

I swear, you must be the king of coming up with cool sheet, man. I'm impressed!
Posting as just me, not as the forum owner. Everything I say is "in my opinion" and YMMV -- which should go for everyone without saying.
User avatar
Doug Coulter
 
Posts: 3515
Joined: Wed Jul 14, 2010 7:05 pm
Location: Floyd county, VA, USA

Re: DIY Equatorial Mount

Postby Jerry » Fri Apr 25, 2014 5:25 pm

I ordered the smaller harmonic drive from Ebay monday night, $180 shipped. It showed up on my door yesterday morning... From South Korea. Wow...

ImageSmall harmonic drive by macona, on Flickr

The drive is pretty nice and should work great. It feels a bit lumpy turning by hand but connected to a motor is seems fine. I did decide to use the lower res servo on this axis. This axis just stays in one spot one you are locked on, the RA axis does all the tracking. If all else fails I can pick up another motor for the other J2S drive I have.

For a control I am going to try using an arduino, this guy came up with a ASCOM compatible arduino based controller for mounts with step/dir drives. It can connect to a PC and be controlled from ASCOM or LX200 compatible software or through bluetooth with an Android app he wrote. He also wrote an ASCOM compatible driver for the Quantix camera I am using. That saves a lot of time...

http://www.stellarjourney.com/index.php?r=site/equipment_onstep

Finished up a bunch of the CAD last night and should be able to chew up some aluminum this weekend. Digging around in the shop I found a bunch of the 1/2" aluminum that the robot was made out of.
Jerry
 
Posts: 573
Joined: Sun Jul 18, 2010 12:07 am
Location: Beaverton, OR

Re: DIY Equatorial Mount

Postby Starfire » Sun Apr 27, 2014 5:33 pm

Jerry
'How do you read position? (angle) are you just dependant on count of the servo pulses, if so what reference?
Starfire
 
Posts: 143
Joined: Thu Aug 05, 2010 4:26 pm
Location: North Ireland

Re: DIY Equatorial Mount

Postby Jerry » Tue Apr 29, 2014 2:38 am

The motors will go to where they are told and with the precision and lack of backlash in the gearboxes that should be pretty dead on. One guy says I will still have to use a guide scope, that is no problem, I have the stuff for it.

The arduino controller allows you to do at least a 1 star lock after you get your scope polar aligned. Once it is locked on you should be good to go. We'll see!
Jerry
 
Posts: 573
Joined: Sun Jul 18, 2010 12:07 am
Location: Beaverton, OR

Re: DIY Equatorial Mount

Postby Jerry » Fri May 02, 2014 12:55 am

Spent a couple hours making chips last night. This the plate that the Dec motor and gearboxes mount to, it attaches to the big harmonic drive. I still need to counterbore for the screws.

And some video of chips flying.

The part is 8" wide and 14" long.


ImageEquatorial motor mount by macona, on Flickr

Made the motor and gearbox mount tonight. One little goof. I entered a .1 when it should have been a -.1 and started a bore shifted but caught it early.

Next up is building a losmandy style saddle and the frame for the RA drive. Starting to get a bit heavy too, up to about 50lbs now.

ImageHarmonic drive equatorial mount, north side. by macona, on Flickr

ImageHarmonic drive equatorial mount, north side. by macona, on Flickr
Jerry
 
Posts: 573
Joined: Sun Jul 18, 2010 12:07 am
Location: Beaverton, OR

Re: DIY Equatorial Mount

Postby Doug Coulter » Sun May 04, 2014 1:56 pm

I might have some design input for you on star tracking, since I've done it and "get" the signal processing. You can't allow too-fast corrections or everything starts jiggling, no matter how stiff you think you made it. And atmospherics can be a couple hundred Hz, from a nyquist point of view. Any error, of course, smears out your pic of the desired object.

One trick is to detect really-bad momentary atmospherics and prevent exposure on the main camera during them. Yes, if you have a perfect guide star, you can sometimes deconvolve the smear from that, if it's close enough in space and in time (6" diameter density blebs moving at jet-stream speeds ARE a problem), but often as not you have zeros in the deconvolution problem, and then you have a mess you can sometimes solve with heuristics, but most often should just toss that data. So it turns quickly into a lot of work/computation for iffy results.
Might just as well just detect and ditch the ugly stuff, which is lots simpler, if "unconventional" in approach.

I call it stochastic signal processing - detect and only keep the good stuff, simply ditch the crap. You get pretty large gains doing just that, no "guide star laser" required.
Then there's no need to sample above atmospheric Nyquist with a megapixel camera either - which can be a bit difficult.

You should be able to build a sensor on your guide star tracker that will detect extreme smear (as opposed to a slow pointing error) and just shutter the main cam if it's happening. Those photons weren't going to help anyway.
Posting as just me, not as the forum owner. Everything I say is "in my opinion" and YMMV -- which should go for everyone without saying.
User avatar
Doug Coulter
 
Posts: 3515
Joined: Wed Jul 14, 2010 7:05 pm
Location: Floyd county, VA, USA

Re: DIY Equatorial Mount

Postby Jerry » Sun May 04, 2014 4:59 pm

There is some software that does something like that. I cant remember where I saw it.

I weighed the three parts I machined out the day and they came in at 12lbs! Ouch! I modified the design to incorporate lightening cutouts. After about 5 hours of milling and one destroyed cutter plus one remade part I have them finished. I still need to bolt them together and ream out for the taper pins to lock everything together.


ImageDec motor and drive mounts by macona, on Flickr
Jerry
 
Posts: 573
Joined: Sun Jul 18, 2010 12:07 am
Location: Beaverton, OR

Re: DIY Equatorial Mount

Postby johnf » Mon May 05, 2014 4:23 am

Jerry
have you got any fish to go with those chips

all joking aside
awesome!!
johnf
 
Posts: 433
Joined: Sun Aug 08, 2010 3:51 pm
Location: Wellington New Zealand

Re: DIY Equatorial Mount

Postby Doug Coulter » Mon May 05, 2014 1:58 pm

I think I sent you some software for that, but you had to manually select frames from a video to combine. I did it to get color with a monochrome camera and filters....pain to do. A shutter hooked to a detector on the star-tracker would make that automatic and easy (if doing the shutter didn't shake the scope - but after all, it could be large and in front of the objective and on its own mount for example). At any rate, if I didn't send that software, it's here and I will if I run across it. Or it could be an LCD like from a welding helmet you just turn on and off. Lots of ways.
Posting as just me, not as the forum owner. Everything I say is "in my opinion" and YMMV -- which should go for everyone without saying.
User avatar
Doug Coulter
 
Posts: 3515
Joined: Wed Jul 14, 2010 7:05 pm
Location: Floyd county, VA, USA

Next

Return to Physics

Who is online

Users browsing this forum: No registered users and 3 guests