Nope, no idea. Just one more tool in my arsenal.
Made some useful things with the laser cutter tonight. Some insulators for a circuit board out of Kapton.
Found my tuning was not quite stiff enough. I think that's fixed now.
Project: Laser Cutter (CNC)
Re: Project: Laser Cutter (CNC)
![]() by Jerry » Thu Aug 16, 2012 2:27 am
by Jerry » Thu Aug 16, 2012 2:27 am
- Jerry
- Posts: 573
- Joined: Sun Jul 18, 2010 12:07 am
- Location: Beaverton, OR
Re: Project: Laser Cutter (CNC)
![]() by chrismb » Fri Aug 17, 2012 5:41 pm
by chrismb » Fri Aug 17, 2012 5:41 pm
hi Jerry. What's the source of the 10kHz pitch I can hear on the video's sound track? Is the laser pulsed at that frequency?
- chrismb
- Posts: 620
- Joined: Thu Aug 05, 2010 6:32 pm
Re: Project: Laser Cutter (CNC)
![]() by Jerry » Sun Aug 19, 2012 9:12 pm
by Jerry » Sun Aug 19, 2012 9:12 pm
Yep, the q-switching. It's worse in person!
10khz is the highest peak power. Eventually I will have the computer control the frequency and with that the power. The higher the frequency the less power.
10khz is the highest peak power. Eventually I will have the computer control the frequency and with that the power. The higher the frequency the less power.
- Jerry
- Posts: 573
- Joined: Sun Jul 18, 2010 12:07 am
- Location: Beaverton, OR
Re: Project: Laser Cutter (CNC)
![]() by Doug Coulter » Mon Aug 20, 2012 12:10 pm
by Doug Coulter » Mon Aug 20, 2012 12:10 pm
I liked that cutting kapton. You know, the signmaker guys have "plotters" that have knives to cut vinyl sticky-backed stuff to make signs. With this, you could do it with better materials.
Posting as just me, not as the forum owner. Everything I say is "in my opinion" and YMMV -- which should go for everyone without saying.
-

Doug Coulter - Posts: 3515
- Joined: Wed Jul 14, 2010 7:05 pm
- Location: Floyd county, VA, USA
Re: Project: Laser Cutter (CNC)
![]() by Jerry » Thu Aug 23, 2012 11:54 pm
by Jerry » Thu Aug 23, 2012 11:54 pm
I got 4 of the 5 sides on the machine now and installed a massive LED array for light on the top. I need to use my friends big CO2 to cut the front panel to fit.
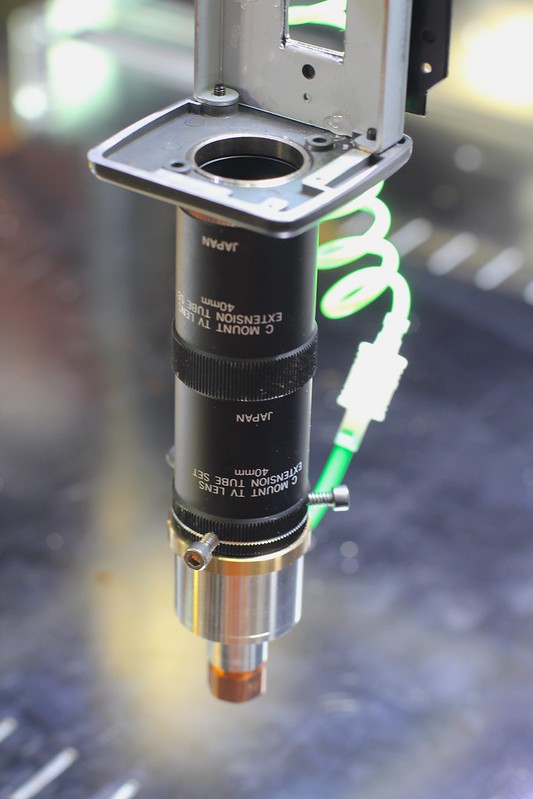
A couple days ago I made the lens mount. I used a 40mm C mount extension for the body and made a spacer and flange to hold it all together.
IMG_2668 by macona, on Flickr
Also the resonance came back on the Y axis so I added a bracket made from some of the left over stainless from the machine.

IMG_2669 by macona, on Flickr
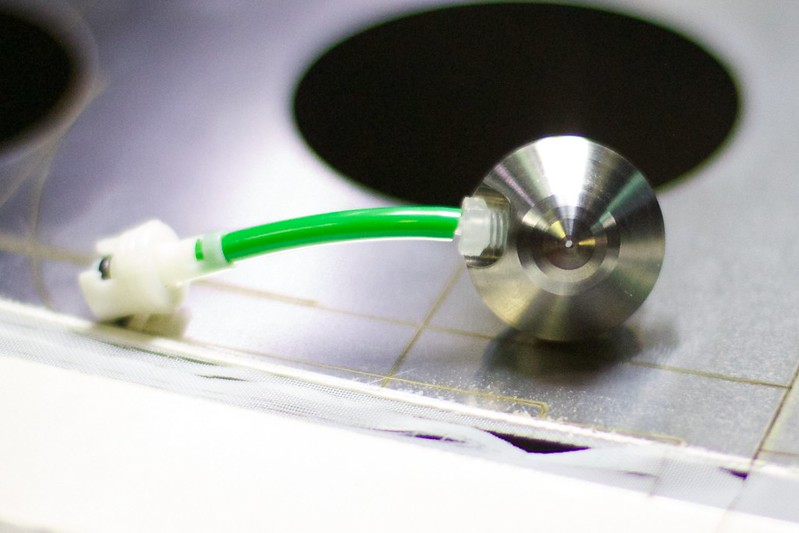
For the nozzle I decided to go with a factory made nozzle. I found some Bystronic nozzles on ebay, $100 for 12. 1.5mm hole. I had to order a 10mm x.5 tap which showed up today. I made the nozzle holder out of a piece of aluminum and single pointed the threads to fit the C mount. The air assist comes from the side to a quick disconnect.

IMG_2674 by macona, on Flickr
IMG_2673 by macona, on Flickr
A couple days ago I made the lens mount. I used a 40mm C mount extension for the body and made a spacer and flange to hold it all together.
IMG_2668 by macona, on Flickr
Also the resonance came back on the Y axis so I added a bracket made from some of the left over stainless from the machine.
IMG_2669 by macona, on Flickr
For the nozzle I decided to go with a factory made nozzle. I found some Bystronic nozzles on ebay, $100 for 12. 1.5mm hole. I had to order a 10mm x.5 tap which showed up today. I made the nozzle holder out of a piece of aluminum and single pointed the threads to fit the C mount. The air assist comes from the side to a quick disconnect.
IMG_2674 by macona, on Flickr
IMG_2673 by macona, on Flickr
- Jerry
- Posts: 573
- Joined: Sun Jul 18, 2010 12:07 am
- Location: Beaverton, OR
Re: Project: Laser Cutter (CNC)
![]() by Jerry » Sun Sep 16, 2012 3:16 am
by Jerry » Sun Sep 16, 2012 3:16 am
A shim for a Canon camera. It takes up the slop between the camera body and the lens adapter for Nikon lenses. Cut from .006 stainless.
- Jerry
- Posts: 573
- Joined: Sun Jul 18, 2010 12:07 am
- Location: Beaverton, OR
Re: Project: Laser Cutter (CNC)
![]() by Doug Coulter » Mon Sep 17, 2012 10:26 am
by Doug Coulter » Mon Sep 17, 2012 10:26 am
Sweet! Round holes in thin metal - something I had to fight with the old-bad way this weekend myself.
I didn't get the entire thing (it's multiple pages), but here's what this one writeup did for our site stats. Evidently, hackaday is a real good place to get a link from.
Hits from my sig on Slashdot and GM-Volt.com are 2nd and third. Quite a few also coming from G+ people I talk to (did a live fusor demo last night) but....this simply swamped them all.
I didn't get the entire thing (it's multiple pages), but here's what this one writeup did for our site stats. Evidently, hackaday is a real good place to get a link from.
- Part of our site stats
Hits from my sig on Slashdot and GM-Volt.com are 2nd and third. Quite a few also coming from G+ people I talk to (did a live fusor demo last night) but....this simply swamped them all.
Posting as just me, not as the forum owner. Everything I say is "in my opinion" and YMMV -- which should go for everyone without saying.
-
Doug Coulter - Posts: 3515
- Joined: Wed Jul 14, 2010 7:05 pm
- Location: Floyd county, VA, USA
Re: Project: Laser Cutter (CNC)
![]() by Jerry » Sun Oct 28, 2012 1:49 am
by Jerry » Sun Oct 28, 2012 1:49 am
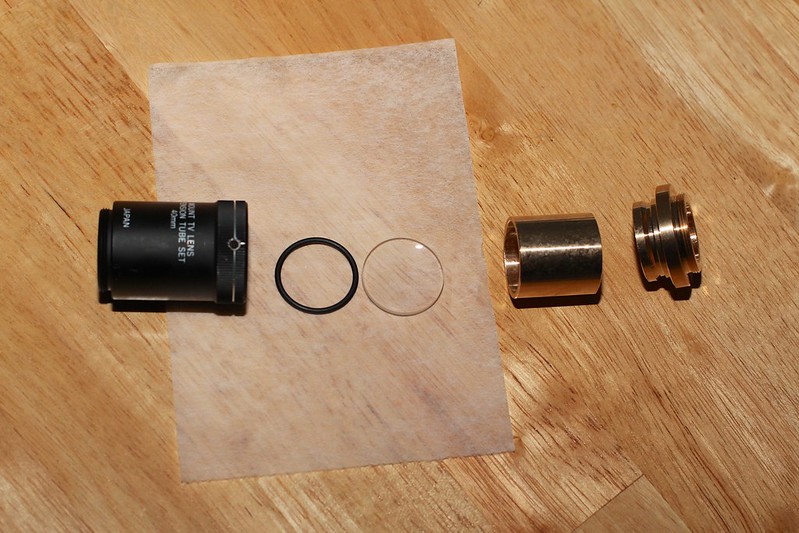
I got a new lens for the laser cutter, 18x22mm focal length. I wanted to try something with a smaller spot diameter for higher power density. With the short focal length there was no way to make use of the nozzles I had bought for the other lens I was using (3" FL) so I made a new lens holder/nozzle for it last night.
I found an adapter of some sort lying around. It went from a 25mm thread to a 20mmx.7 internal thread. The 25mm thread was close enought to a 1" c mount where it screwed together just fine, the thread pitches were virtually identical. To back up the lens in the adapter I took some hollow aluminum and made some threaded rings with the 20mm thread in the adapter.
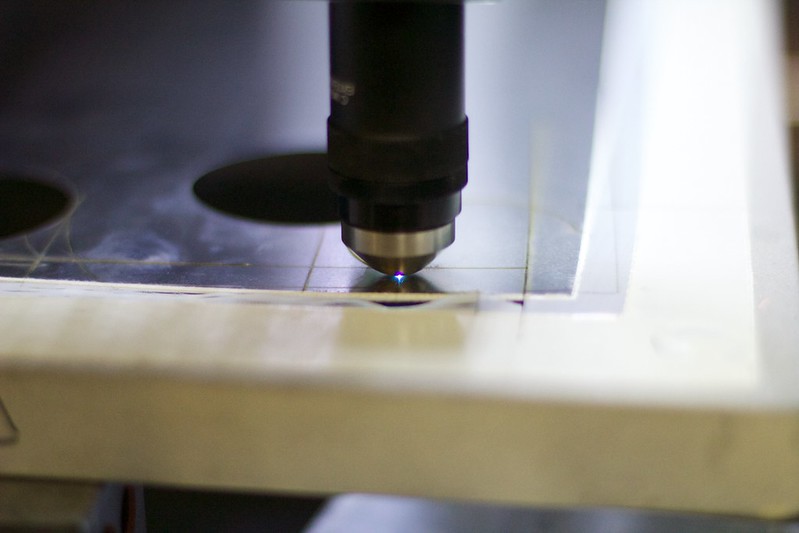
For the nozzle I needed something light. I didnt have any more solid 1" aluminum bar, but I did have some 1" titanium lying around. I cut the 20mm threads on the end (Ti threads very nice) and made a 18.1mm recess for the lens. I drilled down with a #7 drill and finally drilled the final orifice hole with a #60 drill. I opened up the area next to the lens with a 15/32 drill as well. I had just tapered the outside of the nozzle 45 up to about a 1/4" diameter area around the orifice but I was having an issue with the air flow causing the material to pull up against the nozzle, I cant remember what this effect is called, but I see it in plasma cutters a lot. To resolve this I made the outside of the nozzle more round.
After turning I put it on the mill and spot faced a land for the 10-32 gas fitting.
It works pretty well, I do need to space back the lens a but, the focal point is a bit further out than I would like. Nothing an o-ring cant fix.

IMG_3110 by macona, on Flickr
IMG_3111 by macona, on Flickr
IMG_3112 by macona, on Flickr
I found an adapter of some sort lying around. It went from a 25mm thread to a 20mmx.7 internal thread. The 25mm thread was close enought to a 1" c mount where it screwed together just fine, the thread pitches were virtually identical. To back up the lens in the adapter I took some hollow aluminum and made some threaded rings with the 20mm thread in the adapter.
For the nozzle I needed something light. I didnt have any more solid 1" aluminum bar, but I did have some 1" titanium lying around. I cut the 20mm threads on the end (Ti threads very nice) and made a 18.1mm recess for the lens. I drilled down with a #7 drill and finally drilled the final orifice hole with a #60 drill. I opened up the area next to the lens with a 15/32 drill as well. I had just tapered the outside of the nozzle 45 up to about a 1/4" diameter area around the orifice but I was having an issue with the air flow causing the material to pull up against the nozzle, I cant remember what this effect is called, but I see it in plasma cutters a lot. To resolve this I made the outside of the nozzle more round.
After turning I put it on the mill and spot faced a land for the 10-32 gas fitting.
It works pretty well, I do need to space back the lens a but, the focal point is a bit further out than I would like. Nothing an o-ring cant fix.
IMG_3110 by macona, on Flickr
IMG_3111 by macona, on Flickr
IMG_3112 by macona, on Flickr
- Jerry
- Posts: 573
- Joined: Sun Jul 18, 2010 12:07 am
- Location: Beaverton, OR
Return to Machining and Fabrication
Who is online
Users browsing this forum: No registered users and 1 guest