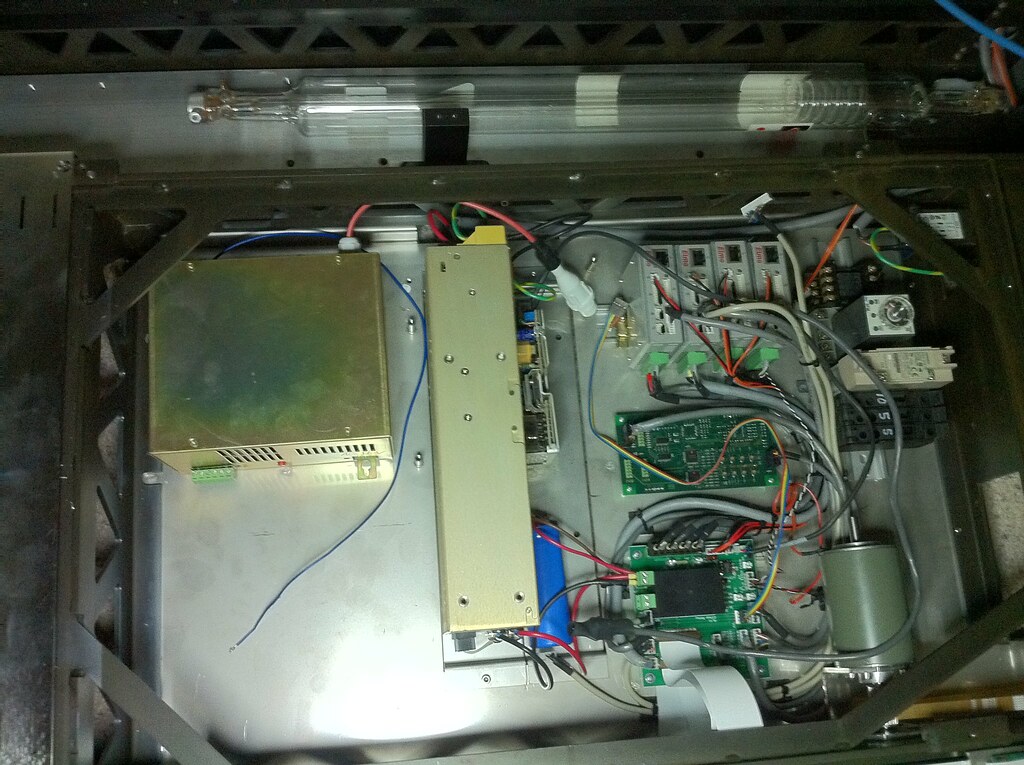
Re: Project: Laser Cutter (CNC)
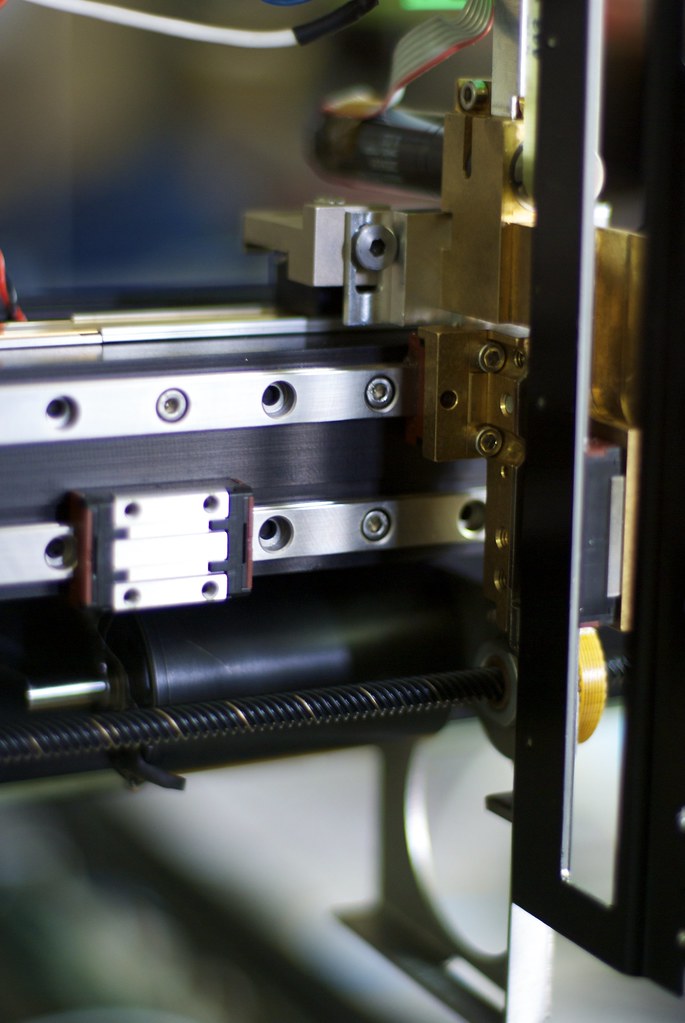
I beefed up the Y motor mount. Silver soldered a piece of stainless to unitize. Much more rigid now.
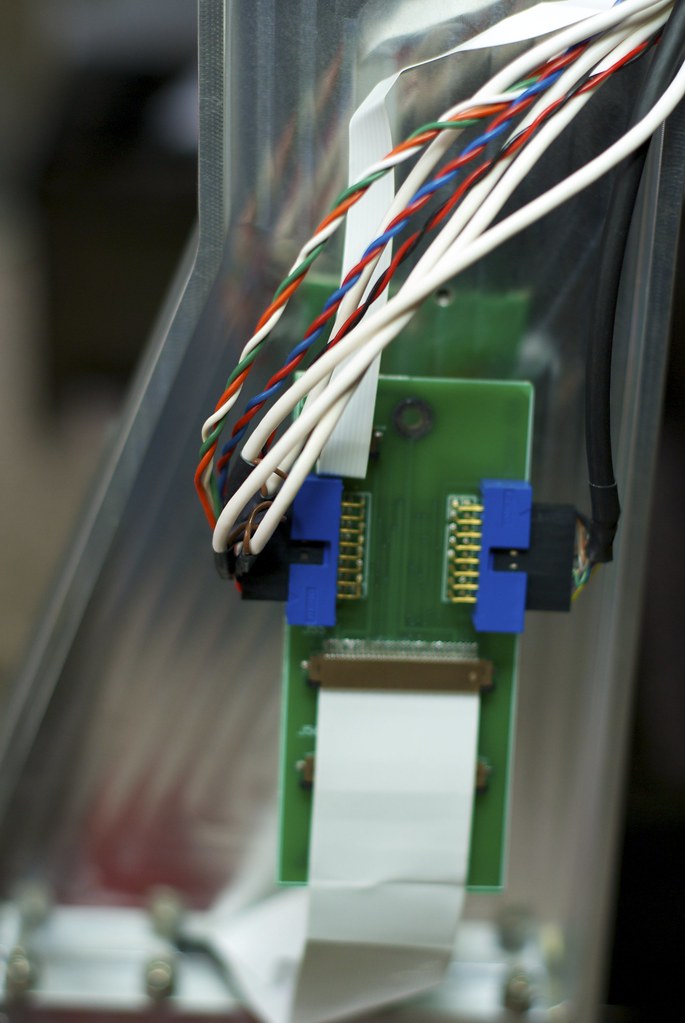
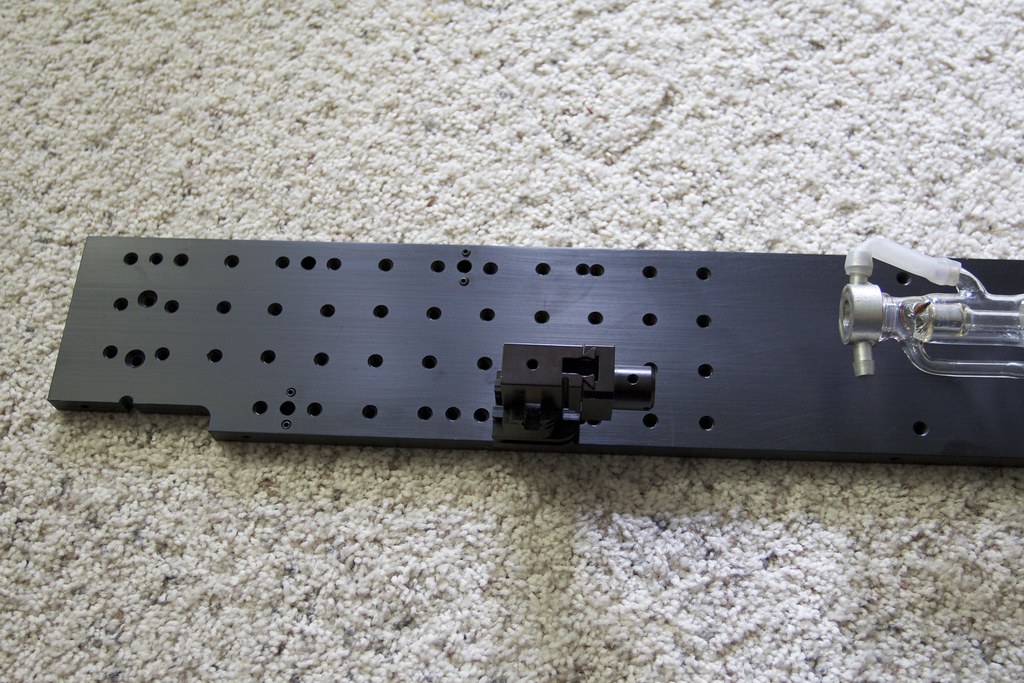
I also got the Y axis linear encoder strip mounted down and machined an adapter to mount the reader head to the back of the carriage.
IMGP6549 by macona, on Flickr
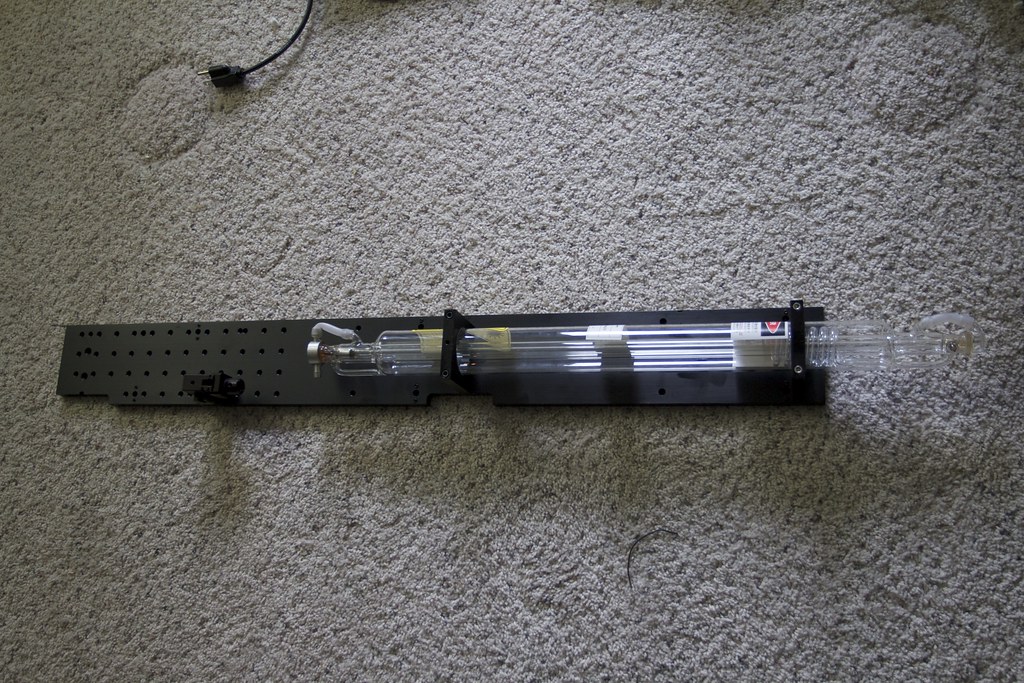
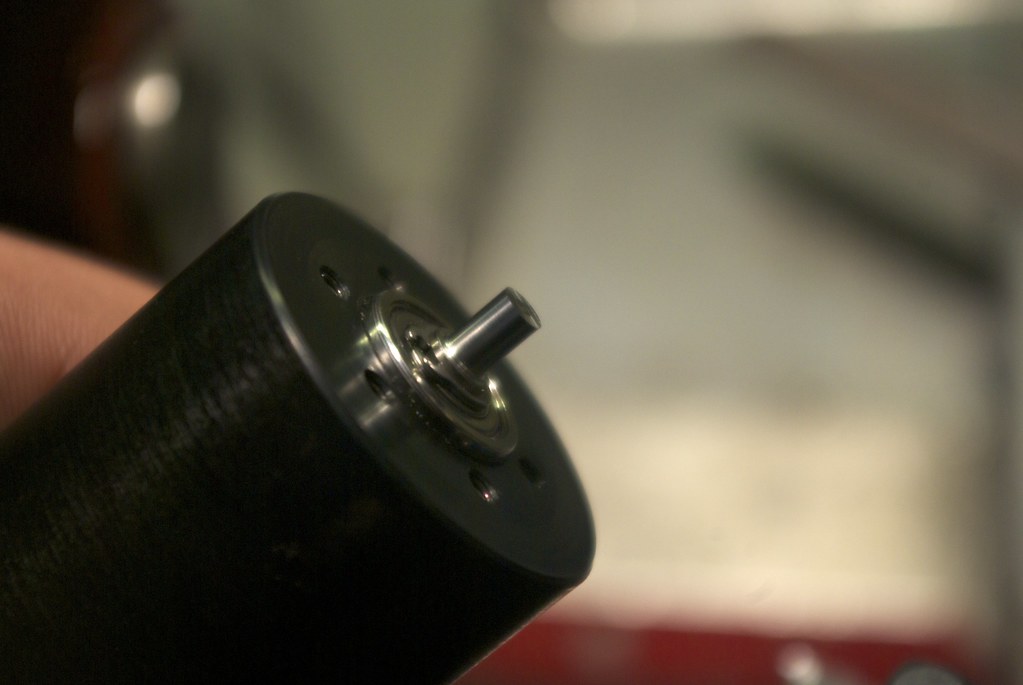
Once that was done I attempted to tun the Y axis motor. It just would not tune. Complaining about the encoder and all sorts of stuff. One time I tried to tune it I got a weird noise from the motor and that was all she wrote. Looks like I fried a winding. Swapped drives to make sure and got the same result. So it was time to redesign. I was thinking of various other drive methods like belts and stuff. I went to a friends surplus store and picked up a couple small DC servos. One was a MicroMo/Faulhaber 3863 series motor. Just so happens it has the same hole pattern as the old maxon flat motor. I had to mill out the shaft hole a bit but it seems to work. I also had to turn the shaft down to 3mm from 6mm to install the old pulley. I ended up using a 5C collet in the lathe to drive the motor while the motor housing was held in the steady rest. The shaft was hardened so I used a nice polished carbide insert to shave it down. Put a dab of loctite on the shaft and put the pulley in place.

IMGP6540 by macona, on Flickr
IMGP6542 by macona, on Flickr
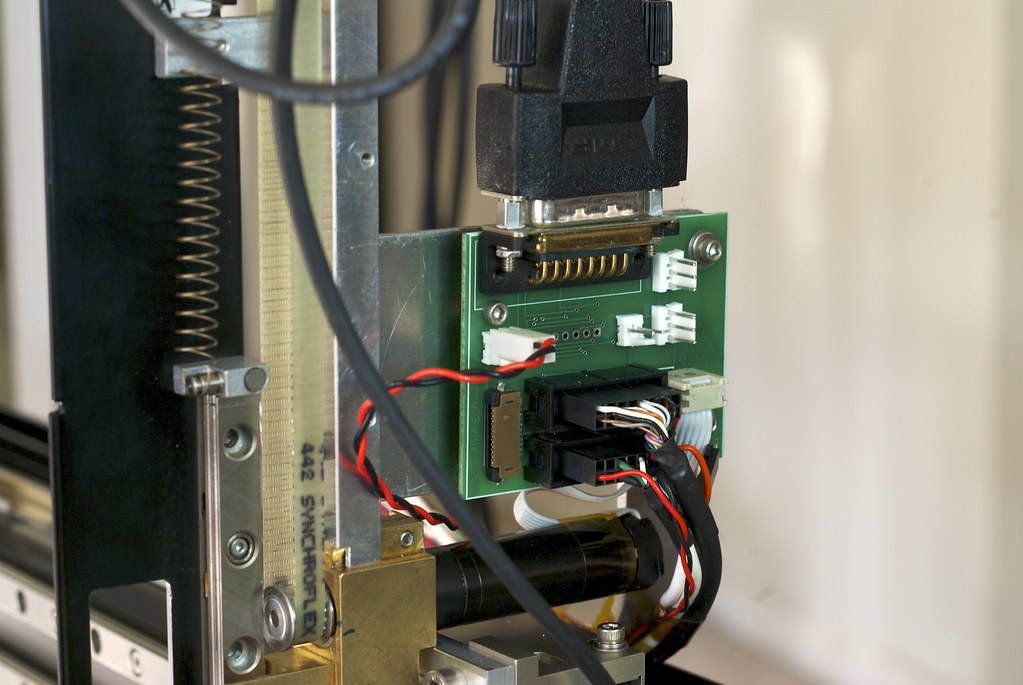
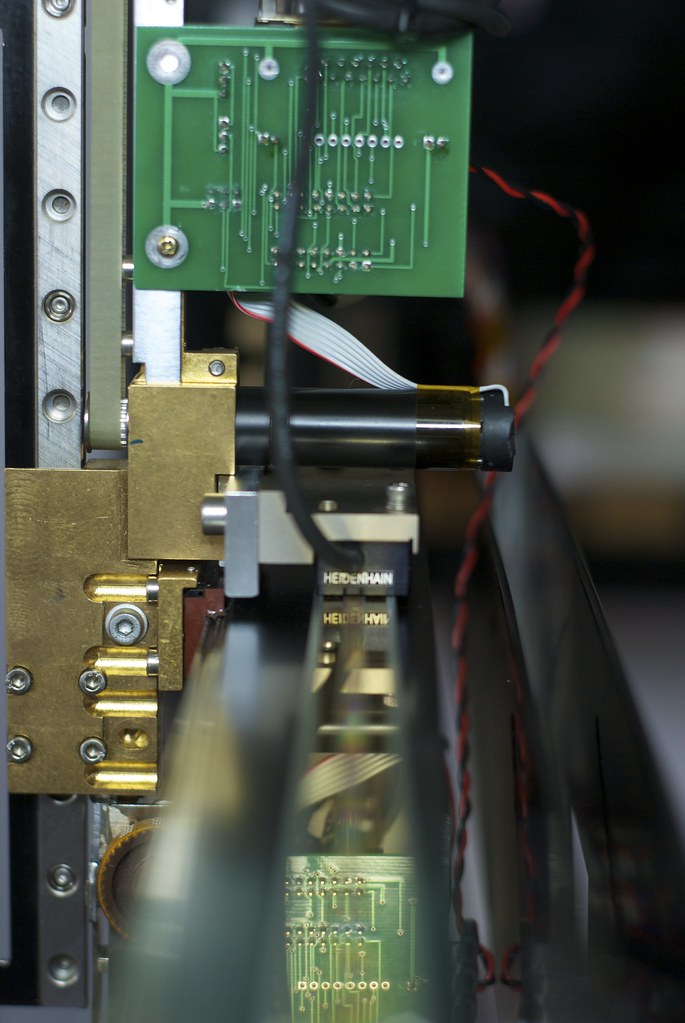
I had left extra pads for a connection to a DC servo in case I couldnt get the brushless motor to work. I installed a connector on the board and wired up the motor. Ran the configure routine and auto tune and it tuned perfectly. Stinking powerful motor. Rated over 200 watts. I do need to machine a touch from the end support to clear the motor still. You can see the motor (black) in this shot:
IMGP6547 by macona, on Flickr
I also got the Y axis linear encoder strip mounted down and machined an adapter to mount the reader head to the back of the carriage.
IMGP6549 by macona, on Flickr
Once that was done I attempted to tun the Y axis motor. It just would not tune. Complaining about the encoder and all sorts of stuff. One time I tried to tune it I got a weird noise from the motor and that was all she wrote. Looks like I fried a winding. Swapped drives to make sure and got the same result. So it was time to redesign. I was thinking of various other drive methods like belts and stuff. I went to a friends surplus store and picked up a couple small DC servos. One was a MicroMo/Faulhaber 3863 series motor. Just so happens it has the same hole pattern as the old maxon flat motor. I had to mill out the shaft hole a bit but it seems to work. I also had to turn the shaft down to 3mm from 6mm to install the old pulley. I ended up using a 5C collet in the lathe to drive the motor while the motor housing was held in the steady rest. The shaft was hardened so I used a nice polished carbide insert to shave it down. Put a dab of loctite on the shaft and put the pulley in place.
IMGP6540 by macona, on Flickr
IMGP6542 by macona, on Flickr
I had left extra pads for a connection to a DC servo in case I couldnt get the brushless motor to work. I installed a connector on the board and wired up the motor. Ran the configure routine and auto tune and it tuned perfectly. Stinking powerful motor. Rated over 200 watts. I do need to machine a touch from the end support to clear the motor still. You can see the motor (black) in this shot:
IMGP6547 by macona, on Flickr