Project: Bell Jar Base

How to get to vacuum, what the classes are, and what is needed for what job.

Project: Bell Jar Base

Postby Jerry » Tue Jul 20, 2010 12:57 am

I have a diffusion pumped system that I am building a deposition system with. It was an old Tecnics ion milling machine for electron microscope sample prep. But I have other plans for it! 6" Diff pump with cryo.

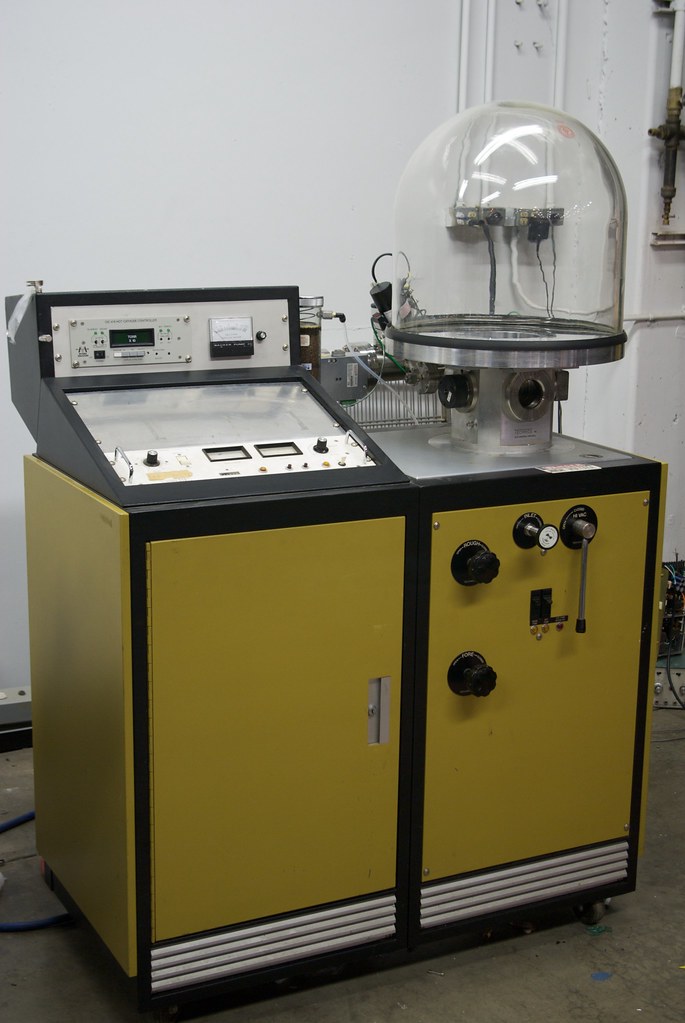
A friend gave me a 18" x 18" Pyrex bell jar for it. He found it years ago in a dumpster at Princeton! :shock: Its in perfect condition, not a scratch or chip!

So I needed a base for it. After weighing my options I found a machine shop that sells cut outs of cast aluminum tooling plate. They largest they have is a plat 18-11/16" in diameter and 1-1/4" thick. It turns out that the OD of the flange of the jar is 18-11/16" Perfect" Price was a little over $100.

Image

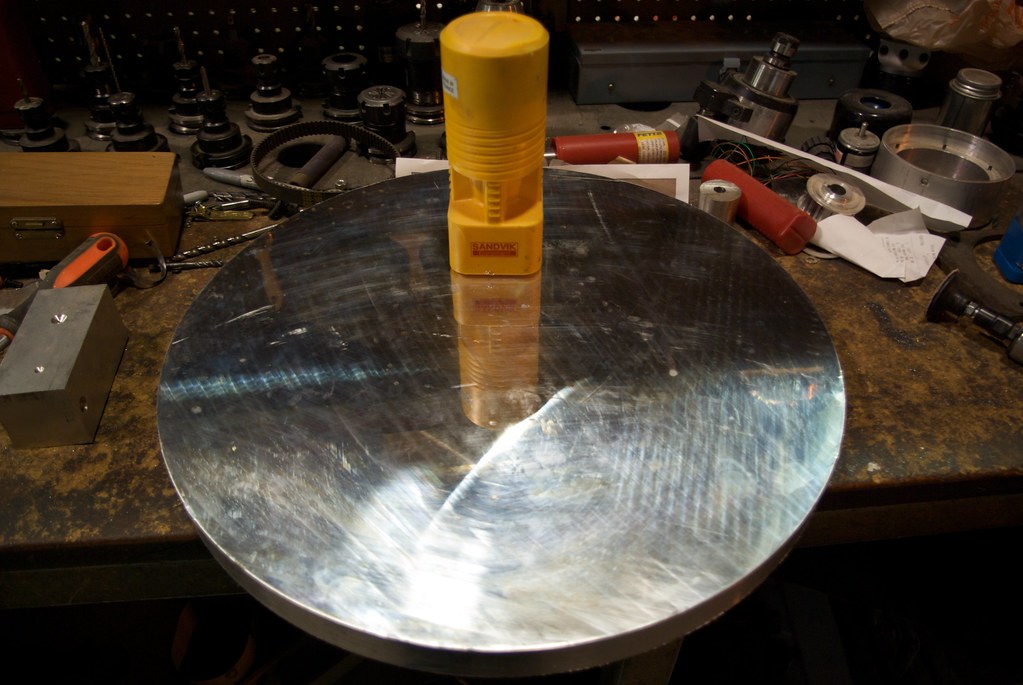
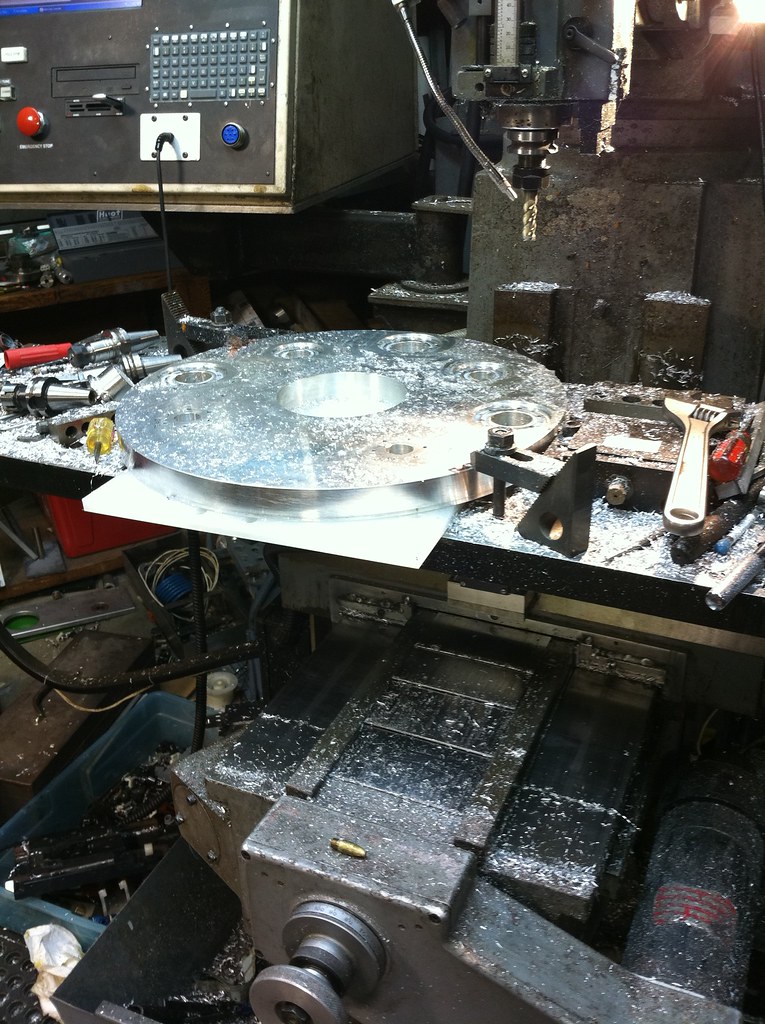
At the time I started this I was still working at TechShop and my friend had brought his milltronics VMC so we used that to bore out the 5-1/2" hole in the center. I made up clamps that pull the bell jar against the base of the old chamber that was existing. Turned out like this:

Image

Short time after that TechShop went under and I had to pack everything up and bring it home. There is set for several months until I decided to use a bedroom I was not using as a lab area and I managed to get it into that room.

I needed ports for the 3kv, 250amp electrical, ferrofludic rotary, and cooling line feedthroughs. I also needed to have ports for the feedthrough on my quartz crystal deposition thickness sensor head as well as a diffuser for feeding gas into the chamber. I managed to figure out how to make all the connections with one of two different ports. One set being 1.035" holes with a ring of 6 bolt holes that will allow me at attach 1" bolt through feedthough or KF-25 vacuum fittings with bulkhead clamps. The other set used a 1-5/8" hole with a ring of 6 10-32 holes and a ring of 6 1/4-20 holes offset bu 30 degrees.

I started tuesday night about 9:30 and finished around 12:30. Not without problems. I had mist coolant issues when getting down to the bottom of the holes and gooped up an endmill. Then I managed to get the x axis off when I had to re-home and it spotted the holes in the wrong place. Got that all sorted out and then had to do another program to counterbore around the perimeters of the ports because some of the spotted holes were right where the o-rings seal. Argh!

Tapped the holes the other night. Boy, thread form taps are nice!

Here is a video showing milling out of one of the ports, drilling the holes for the screws, and finish facing the "oops" counterbores. Click on the video twice to take you to youtube where you can see it in its 720p HD glory!

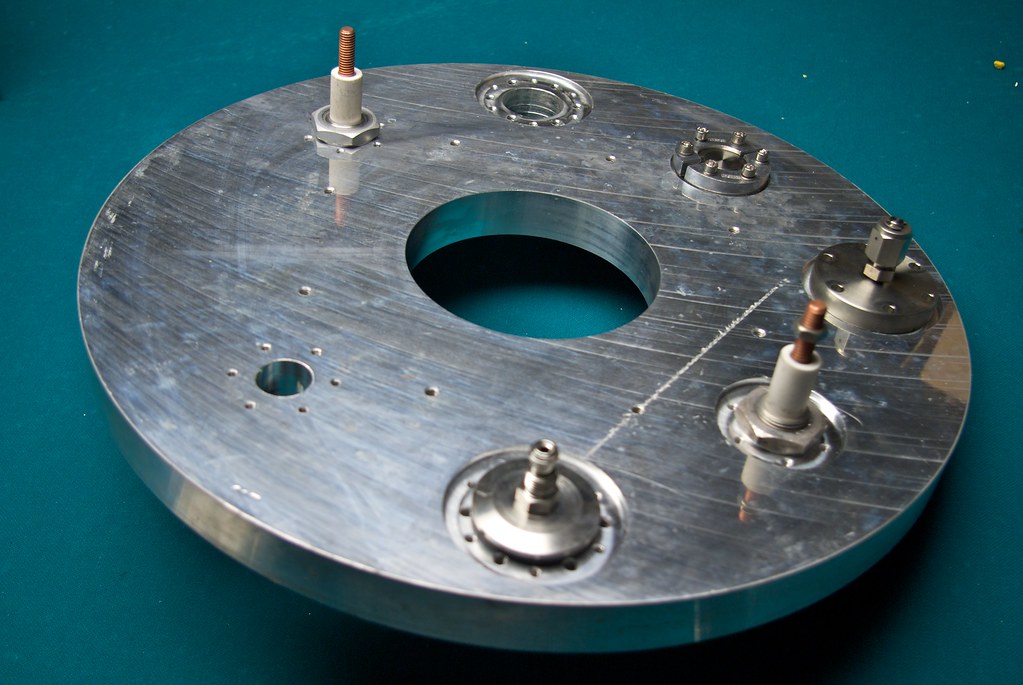
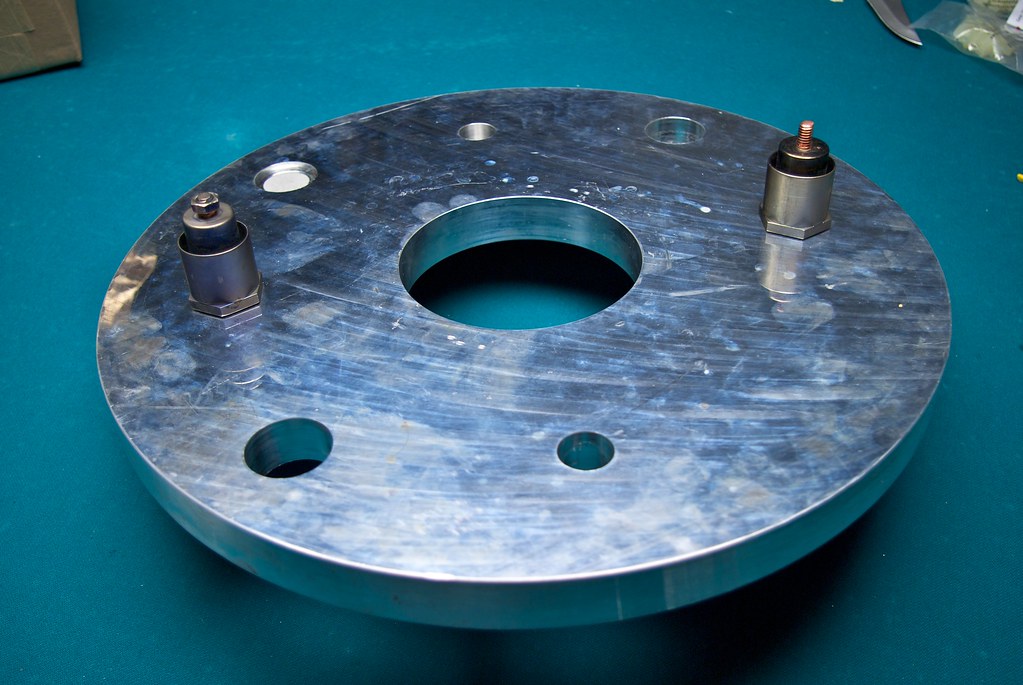
Also pics showing how the parts are installed. One pic is of a gas diffuser installed in one of the ports.

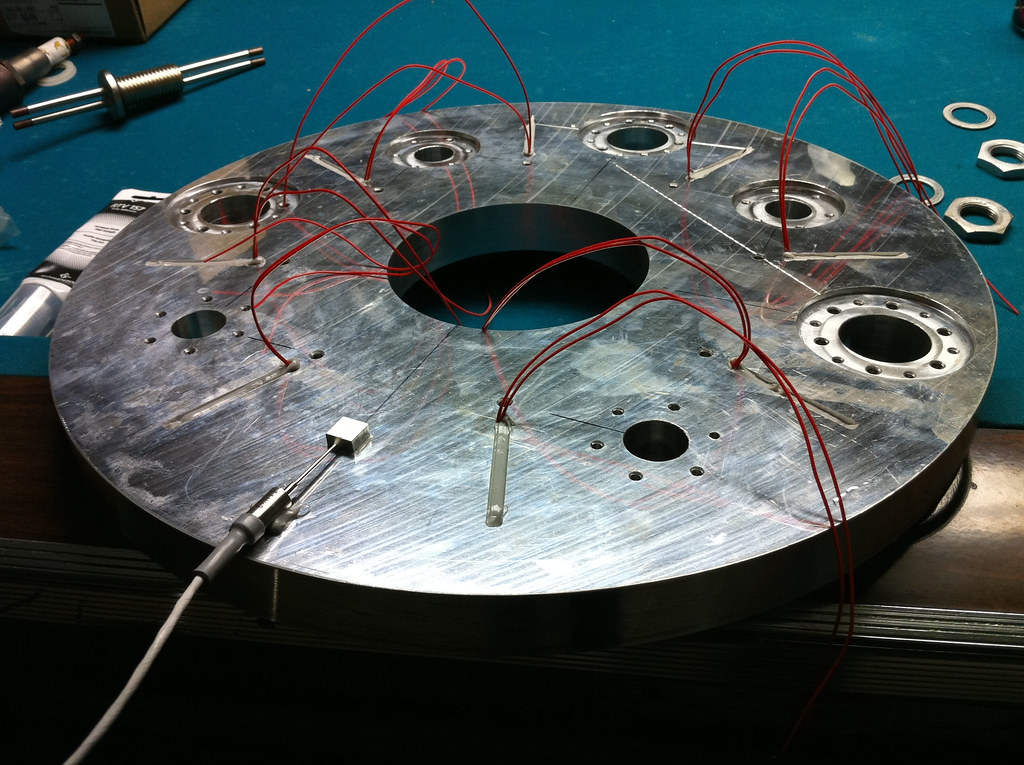
I had also gotten some small cartridge heaters from my friend. The are little guys, 1/4" diameter and about 2" long. 12 watts at 120v and 50 at 240v. I cut 8 slots radially into the plate and installed them with silicone. I also attached some sort of temp sensor to monitor base plate temp during bake out. Not sure what it is, two red wires and two white, but I will figure it out. I think its 4 wire RTD. Thats the last picture.

I still need to figure out if I need to polish the o-ring surfaces. The carbide end mill left a very nice finish and I think it may be in spec for the o-rings. If not I will go at it with some rouge and a wheel on the dremel.


Image

Image

Image

Image

Image
Jerry
 
Posts: 573
Joined: Sun Jul 18, 2010 12:07 am
Location: Beaverton, OR

Re: Project: Bell Jar Base

Postby Doug Coulter » Tue Jul 20, 2010 3:03 pm

Cool! You're going to have a real nice setup there. You should have seen me struggling at first to do things like this with hardware store parts and tools. Or not :cry: At least the experience taught me what does and doesn't matter.

You will almost certainly need to polish the O ring surfaces to get a good seal with no troubles now or later. This is a little counter-intuitive, but they can have larger scale errors -- "waves", but not short scale ones (tiny grooves and pits). That's because the O ring can conform to the big slow errors, but not get down into tiny microinch grooves that cut across the o ring. Eg if you have polish marks, they need to be aimed around the circumference, not across it. A dremel with a cloth or felt burr and some buffing abrasive will do that easily in the material you've got (too fast if you don't pay close attention!). Or you might make something to go in your mill spindle as circumferential grooving doesn't matter. Only across the o ring width. In other words, no swirl grooves from an end mill there can be tolerated as some of them cut across from air to vacuum side of the seal, and those will leak.

Most sources state you need 10-25 micro-inch surface roughness at the ring mating surfaces. In other words, make it a mirror and you're fine, but a funhouse mirror is also fine -- just no scratches across the O ring width -- those along the length don't mater much at all, or even help the seal by digging into the O ring a little. I've tested that one here extensively, as I often make my own QF or ISO-class parts. When I can, I just chuck them in a drill jig and spin them over the shop buffer wheel as it turns to polish off all non-circumferential scratches. Works like a charm, and they give no troubles later -- no sealing grease needed or wanted. That means you can be a little less gentle during any bake-outs, a good thing.

The vacuum pros use a tooling setup that cuts the whole seal area with one tool all at once -- just one big cutter with no motion other than spinning and going down into the cut. This can look rough but all the scratches are oriented where they don't matter, or even help. Kind of like what is used to cut a valve pocket in an engine cylinder head and put on a 3-angle valve job all at once.

Don't forget to put some kind of anti-seize in the tapped holes -- heating and cooling this will make troubles if you don't. I use a gunsmith grease, "Action Magic" from Brownell's, here. It really is "magic" and a single tube will last a lifetime - a little goes a long way. Some kind of synthetic grease with molybdenum disulfide in it. Pretty much stops all cold welding no matter the other materials involved, and it handles temperature extremes just fine -- it was formulated to improve gun triggers for all-weather use -- and it really works.
Posting as just me, not as the forum owner. Everything I say is "in my opinion" and YMMV -- which should go for everyone without saying.
User avatar
Doug Coulter
 
Posts: 3515
Joined: Wed Jul 14, 2010 7:05 pm
Location: Floyd county, VA, USA

Re: Project: Bell Jar Base

Postby Jerry » Wed Jul 21, 2010 11:23 pm

I have some aircraft grade graphite antiseize here. I need to start putting it on my conflat bolts as well. We know how much stainless like to gall. :(

Inficon even sends a little bottle of it with the dep sensor I got.

Next thing to to get those seats polished up and I think I can put it back on. Need to order some KF40 bulkhead clamps too. Only have the one KF-25.

The heaters should make baking out a whole lot easier. That thing is a giant heat sink otherwise.
Jerry
 
Posts: 573
Joined: Sun Jul 18, 2010 12:07 am
Location: Beaverton, OR

Re: Project: Bell Jar Base

Postby Doug Coulter » Wed Aug 04, 2010 10:29 am

On baking out, let me share a couple of things I've found here that will help and which apply especially to large chunks of Al.
First, you don't have to heat the whole thing, just the vacuum-exposed surface. You can do that with quartz-halogen bulbs in there for example, and it is far quicker. You can't run some of the commercial bulbs full power or things melt, but I've had good luck with the smaller bi-pin ones and crimped/clampe connections to the base by something fat enough to conduct out some heat and therefore not melt itself (say, #10 Cu wire, short to the feed through). Even a short time at full power makes enough UV to really blast things off the tank walls, and even take H2O apart -- sometimes only a minute or two does the job.

Second, running a glow discharge in an inert gas (argon for an inexpensive example) will do even better for the parts the ions and electrons hit. Doing a quick pumpdown from STP to rough vacuum, then a refill and pumpdown with argon while making it glow is one of the fastest ways to get to base pressure. If you can arrange things so as to sputter some Ti with that glow and not have it make a mess elsewhere (takes some thought about geometry to keep it off things like insulators) then so much the better -- Ti is a great getter. Leaves a pretty multicolored coat on what it hits as it works, much as when you anodize it (and for the same reasons).

Now, this last might seem counterintuitive, but I've also had great luck with a hard anodize coat, sealed but with no dye, on most Al parts. This is also a really good insulator for those times when you don't want the Al to be either making a field gradient, or shorting out an existing one. If you want, I'll put up some info on that one under materials or something where it would fit, there are some "tricks of the trade" to getting a true hardcoat that isn't more porous and gas-retaining than the original surface. Note that a good hard coat is also a decent thermal insulator, making the bakeout by light trick work even better -- you only have to heat the surface.

I would suggest, however, that you simply bake the thing in a real hot oven (I use my powder coat oven at ~500 deg F) for a couple hours before doing much else. Seems aluminum sequesters some machining oils fairly deep inside it that make trouble for long times after you begin if you don't just do this first, then clean it again. If that warps it, it was gonna warp anyway, and now is the time to find that out and re-machine (dry) if necessary.
Posting as just me, not as the forum owner. Everything I say is "in my opinion" and YMMV -- which should go for everyone without saying.
User avatar
Doug Coulter
 
Posts: 3515
Joined: Wed Jul 14, 2010 7:05 pm
Location: Floyd county, VA, USA


Return to Vacuum Technique

Who is online

Users browsing this forum: No registered users and 2 guests